
Imagine walking into a room decorated with beautiful wall decals, custom T-shirts displaying your favorite quotes, and intricately designed stickers on your laptop. All of these creations can be achieved with a vinyl cutting machine. If you’re a beginner looking to dive into vinyl cutting, you’re in the right place! This vinyl cutting beginner’s guide will get you ready with tips and tricks you’ll need to succeed, and your crafting experience will be smooth and fun.
Vinyl cutting can initially seem daunting, but with the right information and some practice, you can let your creativity run wild. This tutorial will not only shed light on the tools and methods involved but also provide you with tips in your own hands to enhance your skills. If you want to create unique gifts, customized home decor, or merchandise for your small business, let’s get down to business with vinyl cutting!
Overview of Vinyl Cutting Machines
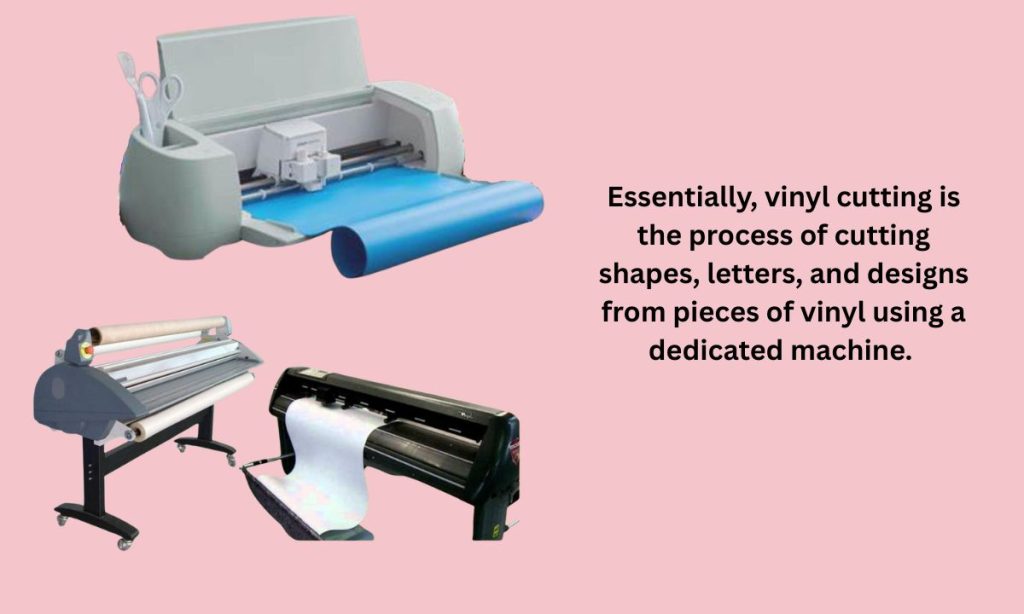
What is Vinyl Cutting?
Essentially, vinyl cutting is the process of cutting shapes, letters, and designs from pieces of vinyl using a dedicated machine. The machines operate somewhat like printers, but they don’t print ink; they cut with a blade. The vinyl can be glued onto surfaces such as walls, clothing, and anything else.
Types of Vinyl Cutting Machines
Understanding the types of vinyl cutting machines will help you choose the one that will work for you when you are starting out. The most important types are:
- Electronic Vinyl Cutters: These are the kinds of machines that have a computer link and allow for more intricate designs. They could have software that allows for easier design and editing of patterns.
- Hand Vinyl Cutters: They utilize hand pressure to cut the vinyl and are not as versatile but more time and usually less expensive.
- Plotters: They are professional-level cutting machines capable of doing large jobs and delicate designs. Professionals tend to use them rather than home crafters.
- Contour Cutters: These cut around printed images so that full-color decals can be produced. They are fairly high-end but ideal for detailed work.
Choosing the Best Machine
When selecting your first vinyl cutter, consider the following:
- Budget: Determine how much you want to spend. Entry-level machines are less than $200, while professional-level machines will be over $2,000.
- Ease of Use: Provide user-friendly interfaces, especially if you are new to the craft. Machines with software that is easy to understand can prevent you from spending countless headaches.
- Materials Compatibility: Ensure that the machine can cut the types of vinyl that you will be using, whether adhesive vinyl, heat transfer vinyl (HTV), or specialty vinyl such as glitter vinyl.
Getting Started Cutting Vinyl
Equipment and Tools You’ll Be Using
To start your vinyl cutting journey, you’ll need some fundamental tools and materials:
- Vinyl Sheets: Choose adhesive vinyl for decals and stickers, and heat transfer vinyl for application on apparel.
- Weeding Tool: Allows you to remove the excess vinyl around your design after it’s cut.
- Transfer Tape: Allows easy transfer of your designs onto the surface of your preference.
- Cutting Mat: A self-healing cutting mat protects your work surface and gives support to the material when it is being cut.
- Design Software: The majority of vinyl cutters come with proprietary software. Programs like Cricut Design Space and Silhouette Studio offer diversity in design choices.
Setting Up Your Workspace
Having a comfortable and well-organized workspace can make your work more efficient. Following are some tips regarding how to set up your vinyl cutter station:
- Choose a Space: Choose a desk or table that has sufficient space to fit your equipment and materials. Ensure there is good lighting.
- Organize Materials: Keep your vinyl sheets, tools, and accessories in bins or drawers. Everything will be at hand and save time.
- Have a Computer Ready: If your equipment requires computer connectivity, ensure your working area is big enough to accommodate a computer or a tablet with the right software installed.
Tips and Tricks for Successful Vinyl Cutting
1. Understand Your Materials
Different vinyl require different cutting requirements. Here’s a brief overview:
- Adhesive Vinyl: Ideal for window decals and signs. It can be cut directly and applied to surfaces without the use of heat.
- Heat Transfer Vinyl (HTV): For application to cloth. HTV requires heat to be applied in order to adhere properly, so ensure you have an iron or heat press.
2. Calibrate Your Machine
Calibration ensures your cuts are precise. Test your cutter’s settings prior to starting projects. Most machines will allow you to change the blade depth and pressure based on vinyl type. Making test cuts will enable you to find the optimal settings.
3. Use Design Software
Invest some time familiarizing yourself with your design software. Use design tutorials on the web to get a feel for the tools and functionality. Programs like Cricut Design Space or Silhouette Studio are very intuitive and give you a whole bunch of templates, fonts, and graphics that you can adapt.
- Find Pre-made Designs: Both tools give you access to a library of pre-made designs. These can be used to provide inspiration and get you started.
- Design Your Own: Go ahead and try creating your own designs! Use shapes, text, and personal images to design unique pieces that belong to you.
4. Master the Weeding Process
Weeding is the process of removing excess vinyl from your design. Precision is necessary here to ensure your end product appears professional. Below are some tips to make weeding easier:
- Utilize a Light Box: Having your vinyl above a light box may light up your design and make it easier to recognize where you need to weed.
- Weeding Tools: Buy a good weeding tool that will help you in picking up small pieces of vinyl, especially with intricate designs.
- Begin with the Centers: Begin with weeding the center sections of letters or intricate designs and move gradually outwards towards the outer sections.
5. Apply Transfer Tape
Once you’ve weeded your design, it’s now time to apply it onto your desired surface. Use these steps to do it successfully:
- Trim the Transfer Tape to Size: Ensure that your transfer tape is a bit bigger than your design to be easily handled.
- Position with Care: Place the transfer tape over your design without forming any bubbles. A scraper tool can smooth things out.
- Lift with Care: When applying, peel the transfer tape back gradually, making sure your design is stuck to the surface entirely.
6. Practice Makes Perfect
Don’t be disheartened by early struggles. All craftsmen have to learn their trade. Some exercises to help establish confidence:
- Beginner Steps: Work with simple shapes and designs prior to moving to more intricate designs. This helps establish basic techniques.
- Sample Making: Try out materials and environments and discover what functions best. Documentation of settings as a reference to look back upon can prove highly valuable.
- Join a Community: Consider joining online forums or local crafting groups. Sharing experiences and tips with others can help boost your skills and provide motivation.
Projects to Try as a Beginner
1. Custom Stickers
Design and cut custom stickers featuring your favorite quotes or images. They can personalize your workspace, decorate your notebook, or serve as gifts.
2. T-Shirts and Apparel
With heat transfer vinyl, make custom T-shirts or tote bags. Try different fonts and designs for unique fashion statements.
3. Wall Decals
Cut out inspiring quotes or fun shapes to enhance your wall decor. Vinyl wall decals can literally make a room and are easy to apply and remove.
4. Mugs and Glassware
Utilize adhesive vinyl to customize mugs or glassware. They can be great gifts for others as well as mirror your design skills.
5. Home Decor
Design stencils for pillows or decorative signs. Vinyl cutting allows endless imagination, customizing, and fun home decorations!
How to Care for Your Vinyl Cutter
General Care Tips
Keeping your vinyl cutter in good condition can keep it working longer and better:
- Clean the Blade: Dust and dirt may influence cutting accuracy. Clean the blade and machine surfaces on a regular basis.
- Update Software: Make sure to use the current version of your design software. Updates bring new features and better functionality.
- Store Properly: Keep your machine covered when not in use and store the blades safely to prevent dulling.
Conclusion
Vinyl cutting opens up a world of creative expression that can be reached by anyone with the right tools and expertise. As you embark on your journey, remember that practice and patience are key to learning this craft. With hard work and an openness to trying new things, you can make stunning pieces of art that speak for themselves and reveal your own distinct personality.
Remember, every expert was once a beginner, so don’t rush the process. Embrace the learning curve, and soon you’ll find yourself confidently creating beautiful vinyl projects.
Leave a Reply
You must be logged in to post a comment.