
Have you ever wondered how a t-shirt is nicely customized or how a tote bag winds up having such a great design? The secret behind such marvelous pieces of artwork is typically the heat pressing process. Do you want to join the world of heat pressing? Look no more. In this definitive guide, we provide all the information you need to get started, covering everything from basic equipment to materials suitable for beginners.
What is Heat Pressing?
Before we dive into the fundamentals, let’s first define heat pressing. Heat pressing is a process of attaching heat transfer vinyl (HTV), sublimation prints, or other materials to substrates (like fabric, mugs, and more) using a heat press machine. Heat pressing can transform ordinary items into personalized treasures with the right tools and materials, making it a favorite among both hobbyists and entrepreneurs.
Basic Needs for Heat Pressing
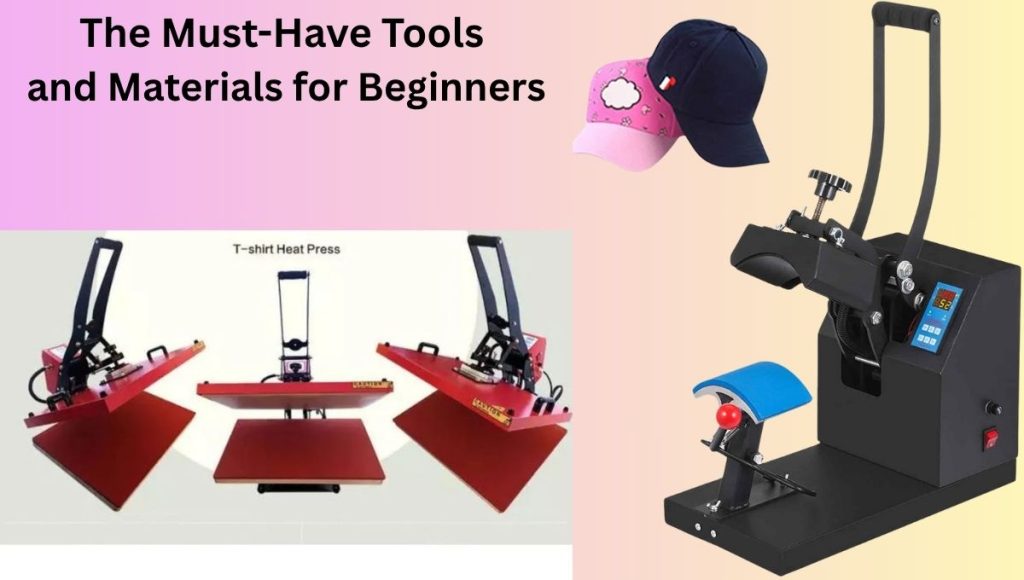
The Heat Press Machine
The cornerstone of any heat pressing venture is, of course, the heat press machine. There are several types, each serving different needs:
- Clamshell Heat Press: Opens like a clamshell, making it a space-saving, easy-to-use machine. Ideal for most beginners.
- Swing-Away Heat Press: The upper platen swings away from the lower one, providing easy access and better safety while working.
- Cap Heat Press: Specially designed for applying designs to hats and caps.
When selecting a heat press, consider features such as temperature control, even plates, and adjustable pressure settings. Cricut and Heat Press Nation are well-known brands for beginners.
Heat Transfer Vinyl (HTV)
Heat Transfer Vinyl comes in a variety of colors, finishes, and types. For beginners, the following types are popular:
- Standard HTV: Ideal for basic designs, available in a variety of colors.
- Glitter HTV: Gives a shiny effect, ideal for fun and flashy projects.
- Glow-In-the-Dark HTV: An excellent choice for night events.
HTV usually comes in rolls or sheets, and it is recommended to opt for high-quality vinyl for optimal adhesion and durability. Siser and Caesar are among the most well-known brands for high-quality HTV.
- Weeding Tools
Weeding is the process of removing excess vinyl from around your design after it has been cut. Here are some of the simple weeding tools you’ll require:
- Weeding Hook: Thin and pointed, this tool helps to lift and pull out tiny pieces of vinyl.
- Tweezers: Excellent for precision weedings, such as small or intricate designs.
- Weeding Knife: Another helpful tool that can help cut and release difficult areas.
Depending on your budget, multi-tool kits can be found at craft stores or online.
- Cutting Machine
A cutting machine is needed for the precision cutting of your designs from the HTV. Some common ones are:
- Cricut Maker: Suitable for a range of materials and comes with design software.
- Silhouette Cameo: Ideal for intricate designs and boasts a strong community for support. You’ll
You’ll also need to match your cutting machine with its corresponding software, such as Cricut Design Space or Silhouette Studio, where you can design or upload your images.
- Teflon Sheets
Teflon sheets are an excellent tool for keeping both your heat press and your projects safe. They can be placed on top of the surface; they’re being pressed to ensure they don’t have direct contact with the heat press, which helps prevent scorching the material. - Heat-Resistant Gloves
Safety first! Heat-resistant gloves protect your hands from burns when handling hot materials. They come in handy when removing items from the heat press or when handling hot tools.
Basic Materials Needed for Heat Pressing
- Blanks (Substrates)
Picking the correct substrate is essential. Blanks are available in all shapes and materials, such as:
- T-Shirts: Cotton, polyester, or cotton/poly blends are perfect for general heat pressing.
- Hats: Fitted and adjustable hats are great for personalization.
- Tote Bags: A promotional product or personalized gift favorite.
- Mugs and Other Hard Substrates: If you are a sublimation enthusiast, you will need to purchase mugs that are specifically designed with a polyester coating.
Ensure that your blanks are suited for the transfer process you are working with.
- Application Tape
Application tape is necessary for moving your designs from the backing paper to the substrate. Different tape strengths are available, but medium-tack tape is recommended for beginners, as it holds well without damaging materials.
- Printer and Sublimation Inks (for Sublimation Pre) you’re
If you’re going to explore sublimation, you’ll need a sublimation printer, along with sublimation paper and inks. Sublimation professionals often rely on Epson EcoTank and Sawgrass printers for their ability to produce rich colors and sharp, high-quality images. - Adhesive Sprays or Sticky Notes
Secure your design with sticky notes or adhesive spray to prevent it from shifting during placement.
They are helpful when designing in layers or with multiple sections.
Using Your Heat Press Like a Pro
After reviewing the essential tools and their trials, it’s time to explore the initial steps for setup and execution.
- Design Creation
In software like Silhouette Studio or Cricut Design Space, upload or design your image. Always mirror your image before cutting HTV to ensure proper orientation after preheating. You don’t need to flip theyou’ren if you’re using sublimation. - Cutting Your Design
Load your HTV or sublimation paper into the cutting machine, select the correct material setting, and let it do its magic! After cutting, inspect the vinyl closely to ensure the design cuts cleanly and the backing remains intact. - Weeding
Using your weeding tools, gradually and meticulously strip away the unwanted vinyl from your design, leaving only the part you want to transfer. This may be tedious at times, but patience is the virtue to cultivate here. - Pre-Pressing
Pre-press your design before applying it to the substrate to eliminate moisture and smooth out any creases. This is a vital step to bring out the optimum from your job and for your design to adhere well. - Positioning Your Design
Carefully position your design on the substrate. Protect it with Teflon sheets during the pressing process. If necessary, use your application tape to secure it. - Pressing and Cooling
Set the temperature and time correctly according to the HTV or sublimation requirements (variables such as brand and type matter). Once the press has finished, allow the item to cool. For HTV, you can peel the carrier sheet hot or cold, depending on the type of vinyl.
Tips for Beginners
- Practice Makes Perfect: Your first tries might not be perfect, but with practice, you’ll improve—don’t give up! Practice using scrap material to get the feel and technique right.
- Start Simple: Begin with simple designs featuring single colors before progressing to more complex, multi-layered designs.
- Follow Guidelines: Each material and vinyl type has precise pressing guidelines, such as temperature and duration. Always follow the manufacturer’s guidelines for the best results.
- Join the Community: Engage in online forums or join local craft communities where you can share your experience, seek advice, and gain inspiration for future projects.
- Document Your Process: Keep a notebook or digital diary of your projects, including settings, materials used, and outcomes, for future reference.
Conclusion
Beginning your heat pressing journey can be a fun and rewarding experience! With the right equipment and materials, and some patience and trial and error, you can create lovely, customized products that are meaningful or generate income if you decide to go into business. Let your imagination lead—the possibilities will follow.
As you embark on your heat pressing adventure, remember that every professional started as a beginner. Never be afraid to experiment with different materials and designs, and let your flair shine through in your creations.
Leave a Reply
You must be logged in to post a comment.