
Here’s an introduction paragraph for your blog article, “Vinyl Cutter Machines for T-Shirts: Everything You Need to Know,” incorporating the search results and following your instructions:
The custom T-shirt market is booming, driven by consumers’ desire for personalized apparel that expresses their unique identities.
Valued at approximately $4.07 billion in 2024, it is expected to reach $9.14 billion by 2034, exhibiting a growth rate (CAGR) of 9.4%.
Vinyl cutter machines for T-shirts have emerged as versatile and accessible tools for tapping into this market.
They enable individuals and small businesses to create custom designs on demand, offering a cost-effective entry point into personalized apparel.
Whether you’re a hobbyist or an entrepreneur, vinyl cutter machines for T-shirts provide the means to bring your creative visions to life and meet the growing demand for custom apparel.
What is a Vinyl Cutter Machine
A vinyl cutter machine is a computer-controlled tool that uses a sharp blade to cut shapes and letters from thin materials like vinyl. The computer controls the movement of the blade, guiding it to cut out designs from sheets of self-adhesive plastic.
To create a design, you need vector-based image software. After designing, the vinyl is loaded, and the machine cuts along the vector paths.
The cutter can move the blade on X and Y axes. After cutting, the wedding involves removing the excess vinyl, leaving only the desired design.
For t-shirts, the weeded design is then placed on the fabric, and a heat press applies heat and pressure to transfer the design onto the garment.

Types of Vinyl Cutter Machines
Vinyl cutter machines come in various types, each suited for different needs and skill levels. Here’s a breakdown of the common types, incorporating details from the search results:
Desktop Vinyl Cutters: These are smaller, more affordable options perfect for hobbyists or small projects. Brands like Cricut (Maker 3, Explore 3, Joy) and Silhouette (Cameo 4, Portrait 3) dominate this category.
The Cricut Maker 3 can work with over 300 materials and uses 13 custom tools. The Silhouette Cameo 4 is known for its power and precision, even offering larger sizes like the Cameo PLUS for a 15-inch cutting width.
Professional Vinyl Cutters: These machines are larger and more precise, designed for businesses that require high-volume production and intricate cuts.
The GCC Expert II series is an excellent choice for small businesses, capable of cutting materials up to 24/52 inches in width.
The GCC Jaguar V Series is ideal for car window tinting and paint protection film, while the GCC RX II series offers high blade pressure and faster cutting throughput.
Multi-Functional Machines: Some machines, like the x-Tool M1, offer a combination of blade and laser cutting capabilities. This provides a versatile tool that can handle a wide range of projects, including cutting, scoring, and engraving.
Key Features to Consider When Choosing a vinyl cutter machines for T-shirts
Choosing the right vinyl cutter machine for T-shirts involves weighing several key features. These factors affect your project’s quality and workflow efficiency.
- Cutting Force and Speed: These determine the range of materials your machine can handle. Cutting force, measured in grams (GF), should suit the material. Delicate materials need around 50 GF, while thicker ones need 500 GF or more. Speed also matters.
Around 300 mm/sec works well for normal vinyl. Slower speeds can increase cut quality, mainly for detailed work. You must set the blade depth correctly for each vinyl type to ensure proper cutting force.
Roland DG’s vinyl cutters have improved production efficiency with 70% more cutting speed and 40% more cutting force.
- Software Compatibility: User-friendly software is essential. Many machines work with Adobe Illustrator and CorelDRAW. Some have their own, like x-Tool Creative Space.
Ensure the software simplifies design. The right software allows using different design options and tools.
- Material Compatibility: A vinyl cutter machine for T-shirts should handle HTV, adhesive vinyl, and printable heat transfer vinyl.
Multi-functional machines may handle reflective materials and thicker laminates. Consider the range of materials your machine can handle for diverse projects.
- Cutting Size: Match the machine’s cutting area to typical project sizes. Desktop cutters work for smaller designs.
For larger projects, a wider cutting area is needed. Air Mark offers a range of vinyl roll cutter machines designed to empower creativity while driving productivity.
My Experience: Starting with a desktop cutter, I quickly realized its limitations. Upgrading to a professional model with a larger cutting area and greater force was a game-changer for handling bulk orders. Think about your potential business growth.
Step-by-Step Guide to Printing a T-Shirt
Creating custom T-shirts with a vinyl cutter machine for T-shirts is a straightforward process. Here’s a step-by-step guide, based on my experience, to help you get professional-looking results:
- Design Preparation: Start by creating or importing your design into the cutting software. Adobe Illustrator, CorelDRAW, or the software that came with your machine works well. Remember to mirror your design horizontally.
This is crucial because the design will be cut in reverse and needs to flip correctly when heat-pressed onto the shirt.
- Cutting the Design: Load your chosen vinyl into the vinyl cutter machine for T-shirts. Adjust the blade settings according to the vinyl type.
Most machines have test cut features; use these to ensure the settings are correct. Start the cutting process. Watch closely to be sure the machine is cutting correctly.
- Weeding: This involves removing all the excess vinyl from around your design. Use a weeding tool (a small hook or tweezers) to carefully peel away the unwanted vinyl.
Patience is key here, especially with intricate designs. Good lighting helps!
- Heat Pressing: Position your weeded design onto the T-shirt. Pre-heat the heat press to the temperature recommended for your vinyl.
Place a Teflon sheet or parchment paper over the design to protect it. Press the design onto the shirt, applying firm, even pressure for the recommended time (usually 15-20 seconds).
- Finishing: Carefully peel away the carrier sheet. Some vinyl’s are “hot peel” (peel immediately), while others are “cold peel” (peel after cooling). Check the vinyl manufacturer’s instructions.
To finish, re-press the design for a few more seconds with the Teflon sheet. Finally, follow proper washing instructions to maintain the design.
Exploring Printable Heat Transfer Vinyl
Printable Heat Transfer Vinyl (HTV) offers a game-changing way to create full-color designs on T-shirts. It allows you to print directly onto the vinyl sheets using a standard inkjet printer. This method eliminates limitations of standard HTV.
Benefits of Using Printable HTV:
- Full-Color Designs: You can print vivid logos, intricate designs, and detailed images that are difficult to achieve with regular HTV5. This opens up a whole new level of design possibilities.
- No Complex Wedding: One of the biggest advantages is that you don’t have to weed complicated designs. The design is printed, then cut around the perimeter, simplifying the process.
- Easy to Use: Printable HTV works with standard inkjet printers. You don’t need specialized equipment, making it accessible for home users.
- Versatility: It works on light and dark fabrics4, expanding your options for T-shirt designs.
- Soft Transfers: Printable HTV creates thin, soft transfers with minimal fading or cracking after washing.
How it Works:
- Print your design on the HTV sheet using a standard inkjet printer.
- Load the printed sheet into your vinyl cutter machine for T-shirts to cut around the designer’s edge.
- Heat presses the design onto your T-shirt, following the manufacturer’s instructions.
Things to Keep in Mind:
- Durability: Depending on the brand and harsh environment, handling, car washes, etc. can decrease life expectancy.
- Material Thickness: Printable adhesive is thicker than standard vinyl5 and becomes a little more rigid when UV Laminate is applied.
For this reason we recommend larger, one-piece designs and avoid small intricate details and designs with many cuts.
- Transfer Tape: Do NOT use transfer tape on uncoated inkjet printed designs as the transfer tape will likely remove some of the ink during the application process.
Tips and Tricks for Best Results
Getting the best results with your vinyl cutter machine for T-shirts involves more than just cutting and pressing. Here are some tips and tricks I’ve learned over time to elevate your custom T-shirt game:
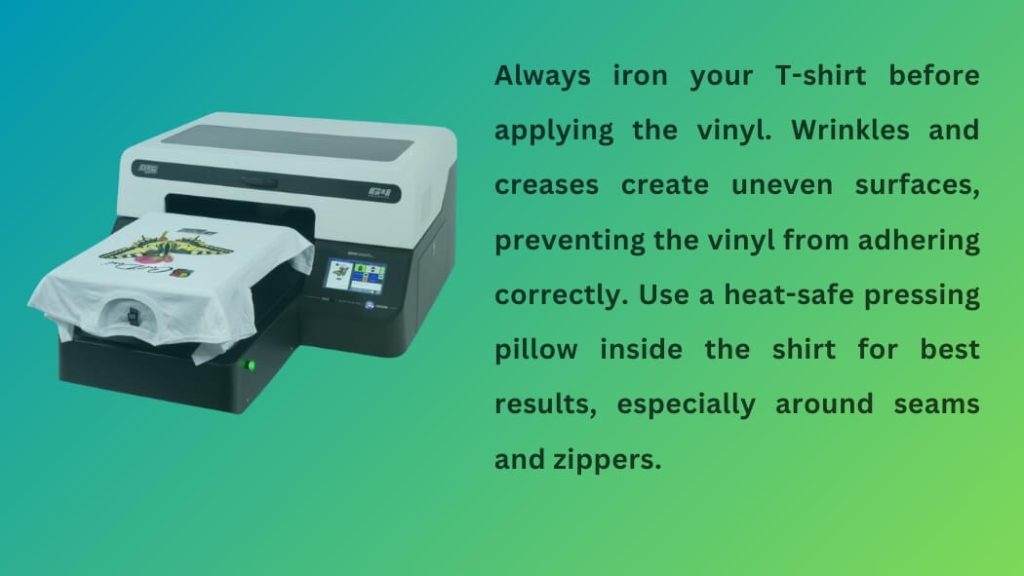
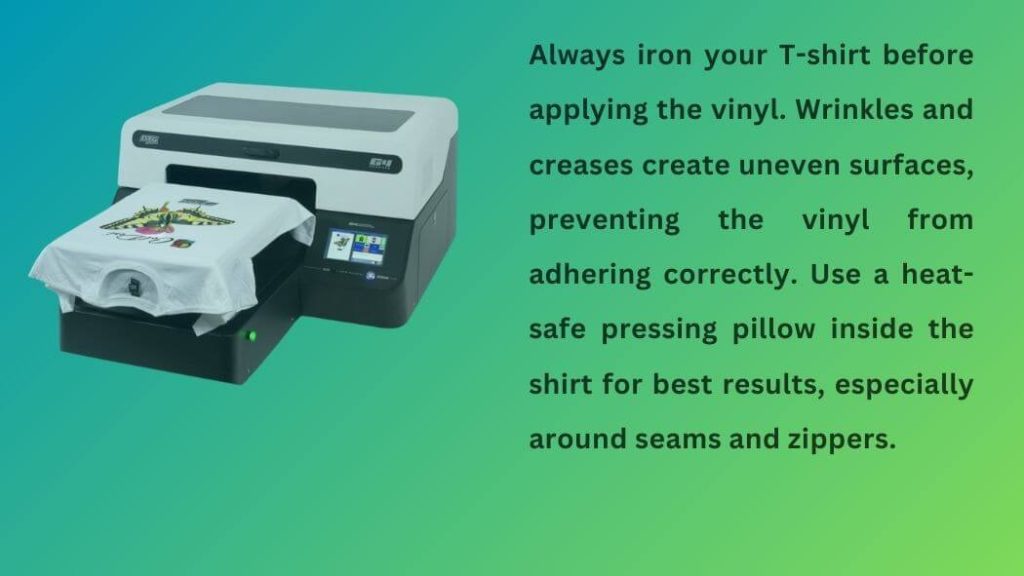
- Properly Preparing the T-shirt: Always iron your T-shirt before applying the vinyl. Wrinkles and creases create uneven surfaces, preventing the vinyl from adhering correctly.
Use a heat-safe pressing pillow inside the shirt for best results, especially around seams and zippers.
- Using the Correct Heat Press Settings: Each vinyl type has specific heat press settings (temperature, pressure, and time). Consult the vinyl manufacturer’s instructions and stick to them.
Too much heat can melt the vinyl or damage the fabric. Too little, and it won’t adhere properly. Consider a heat press with digital controls for precision.
- Layering Vinyl for Multi-Colored Designs: Layering vinyl creates vibrant, multi-colored designs. Here’s how to do it:
- Cut and weed each layer of your design separately.
- Press the bottom layer first, using a shorter pressing time than usual (a “tack” press).
- Position the next layer on top and press again.
- Repeat until all layers are applied.
- Always use a Teflon sheet when layering to protect the vinyl.
- Avoid overlapping too many layers, as this can make the design stiff.
- Test Cuts: Always perform a test cut on a small piece of vinyl before cutting your entire design.
This confirms that your blade settings are correct.
- Quality Materials: Using high-quality vinyl improves results and longevity. Cheaper vinyl can crack, peel, or fade quickly.
- Proper Storage: Store your vinyl rolls in a cool, dry place, away from direct sunlight. This prevents them from drying out or becoming brittle.
Maintenance and Care for Your vinyl cutter machines for T-shirts
To keep your vinyl cutter machine for T-shirts running smoothly and producing high-quality results, regular maintenance and proper care are essential.
Neglecting these tasks can lead to decreased performance, inaccurate cuts, and a shorter lifespan for your machine. Here’s what you need to do:
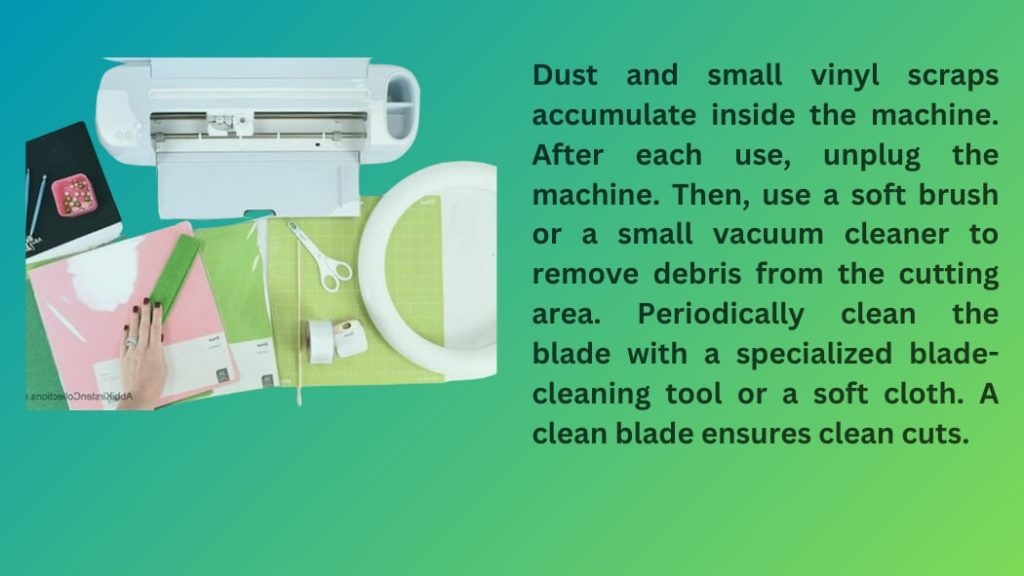
- Cleaning the Machine and Blade: Dust and small vinyl scraps accumulate inside the machine. After each use, unplug the machine. Then, use a soft brush or a small vacuum cleaner to remove debris from the cutting area.
Periodically clean the blade with a specialized blade-cleaning tool or a soft cloth. A clean blade ensures clean cuts.
- Storing Vinyl Properly: How you store your vinyl significantly impacts its quality. Store vinyl rolls vertically in a cool, dry place, away from direct sunlight.
Use a vinyl rack or create your own storage system to keep the rolls organized and prevent them from becoming damaged. Humidity and extreme temperatures can affect the adhesive.
- Replacing the Blade When Necessary: A dull blade causes jagged cuts, uneven pressure, and material waste. Replace the blade when you notice these signs or when the machine starts requiring more pressure to cut through the vinyl.
The lifespan of a blade depends on the frequency of use and the type of materials you cut, so regularly inspect the blade’s sharpness.
- How to Test Blade Sharpness: Perform a test cut on a scrap piece of vinyl. If the cut is clean and the vinyl peels away easily, the blade is still sharp. If the cut is rough or you have to apply a lot of force to weed the vinyl, it’s time to replace the blade.
- Regular Lubrication: Some machines require occasional lubrication of moving parts. Consult your machine’s manual for specific instructions on where and how to lubricate.
- Software Updates: Keep your cutting software up-to-date to ensure compatibility with the machine and access the latest features and bug fixes.
Common Mistakes to Avoid When Using vinyl cutter machines for T-shirts
Even experienced users make mistakes. Here are some common pitfalls I’ve seen (and experienced!) when using a vinyl cutter machine for T-shirts and how to avoid them:
- Not Mirroring the Design Before Cutting: This is the most classic mistake! Forgetting to mirror your design means that when you heat-press it onto the shirt, it will be backward. Always double-check that you’ve mirrored your design before sending it to the cutter. Develop a habit of making this your very first step in the process.
- Using the Wrong Heat Press Settings: Each vinyl has specific temperature, pressure, and time requirements. Using incorrect settings can cause the vinyl to melt, bubble, peel, or not adhere properly.
Always consult the vinyl manufacturer’s instructions and do a test press on a scrap piece of fabric.
- Not Weeding the Design Carefully Enough: Rushing the weeding process can lead to imperfections in your final design. Carefully remove all the excess vinyl, paying close attention to small details.
Good lighting and sharp weeding tools are essential. Take your time, and don’t be afraid to use a magnifying glass for intricate designs.
- Using the Wrong Blade Depth: If the blade depth is too shallow, it won’t cut through the vinyl properly. If it’s too deep, it can cut through the carrier sheet and damage your cutting mat. Always perform a test cut to ensure that the blade depth is correct.
- Ignoring Material Compatibility: Not all vinyl is created equal. Using the wrong type of vinyl for your project (e.g., using adhesive vinyl on a T-shirt) will result in a disaster. Always check that the vinyl you are using is compatible with the material you are applying it to.
- Not Pre-pressing the Garment: Pre-pressing the garment removes wrinkles and moisture. Moisture reduces the vinyl’s ability to adhere, resulting in peeling.
FAQS
Q: What types of vinyl are best for T-shirts?
A: Heat Transfer Vinyl (HTV) is specifically designed for fabrics, offering durability and various finishes like matte, glossy, and glitter.
Q: Do I need to mirror my design before cutting HTV?
A: Yes, mirroring is essential. HTV has an adhesive side, and the design must be cut in reverse to appear correctly when heat is applied to the fabric.
Q: What software can I use to design my vinyl cutter?
A: Popular options include Cricut Design Space (user-friendly for Cricut machines), Silhouette Studio (versatile with advanced tools), and Inkscape (open-source and powerful).
Q: Is a heat press necessary, or can I use an iron?
A: While an iron can work for small projects, a heat press provides even heat distribution and consistent pressure, ensuring better adhesion and longevity for your designs.
Q: What heat press settings should I use for my vinyl?
A: Always refer to the vinyl manufacturer’s recommendations for temperature, pressure, and time settings. A test press is recommended to ensure optimal results.
Q: How do I prepare my T-shirt before applying the vinyl?
A: Preheating the shirt with a heat press or iron removes wrinkles and moisture, ensuring better adhesion of the vinyl.
Q: How do I prevent my vinyl design from peeling off after washing?
A: Use high-quality HTV, apply proper heat press settings, and follow washing instructions. Turn the shirt inside out and wash in cold water.
Q: Can I use adhesive vinyl on T-shirts?
A: While possible, adhesive vinyl is better suited for hard surfaces like mugs. HTV is recommended for T-shirts due to its durability on fabric.
Conclusion
In summary, vinyl cutter machines for T-shirts provide an accessible, versatile, and rewarding way to create custom apparel.
From personalized gifts to small business ventures, the possibilities are truly endless. You have the power to transform blank T-shirts into unique works of art, expressing your creativity and meeting the demand for personalized goods.
I encourage you to explore the exciting world of custom T-shirt design! Start with a simple project, experiment with different materials and techniques, and most importantly, have fun.
Whether you’re a seasoned crafter or a complete beginner, a vinyl cutter machine for T-shirts can unlock your creative potential and turn your visions into wearable reality. Take the leap, and start designing your own custom T-shirts today!
Leave a Reply
You must be logged in to post a comment.