The screen printing technique is widely used because it produces vivid colors, even on darker fabrics. The ink or paint also lies in layers on the fabric’s surface.
Different methods of screen printing, but they all involve the same basic technique. The form of printing we’ll discuss below utilizes a special light-reactive emulsion to create a custom stencil.
Silk-screen printing may seem intimidating at first. But it is much easier than it looks. The good news is that it can be launched as a screen-printing business from home. It is not very expensive. We are here with this guide on efficiently using your silk screen printing machine at home. This step-by-step guide will instruct you on how you can run a screen printing job with the least amount of money and materials.
The primary idea behind silk screen printing is straightforward. It works similarly to a stencil. You do not need to cut out structures individually. You cover a screen in photo emulsion instead. After that, cut a design or logo out with a bright light.
Check out: the 10 Best Screen Printing Kits for Beginners
Now we walk through the process in more detail. Let’s go…
Set Up a Silk Screen Printing Machine at Home

Step 0: Arrange Silk Screen Printing Supplies
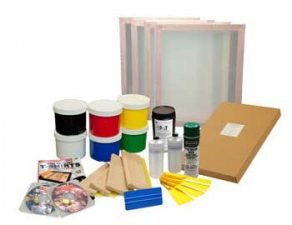
First, ensure you have obtained all the silk screen printing supplies you need throughout the process. Here is a list of silk-screen supplies for the silk-screen printing machine in order:

- Frame and screen
- Photo emulsion and sensitizer
- One 250-watt bulb
- Latex gloves
- Plain t-shirts on which you want to print
- A pitch-dark room
- Silk fabric ink
- Squeegee
- Cardboard to fit inside the t-shirt

Step 3: Expose Your Design on the Screen
Now, you will need to expose your screen to the light. Still, do not switch the lights on in your previously arranged pitch-black room. Then, place a dark cloth or board on the ground. Lay down your screen and framework, with the screen side down on the top of the black surface. Now, put the transparent sheet with your design on your screen where there is your photo emulsion. Hook up the transparency sheet using Scotch tape or put a piece of glass on it.
Move your lamp approximately 2-3 feet above the screen. Angle the light using a 250-watt bulb on the transparent sheet with your design. Go out of the room. Here, it would help if you chose a desk lamp that suits you best. If you cannot arrange a desk lamp, you can create a reflector using tin foil and place it above the lamp to redirect the light downward. Wait. Do not switch any lights on.
After about 15 minutes, enter the room and pull up the transparency sheet. You will see that the designed image is burned into your screen, and faint blue lines are also visible. If you like this, then clean it off. If you don’t like this, please leave it and wait for a while, then check again. But be aware of overexposure. It can make your design bleed.
Step 4: Clean Your Screen
It is time to clean your screen. Keep the screen under a hose, sink, or showerhead, and splash it with cold water. Carefully notice if your image flakes off or not. Only when you can watch your image well do you stop spraying. Grip the screen against the light to ensure it appears transparent. Wait until the screen is dry. After it is dry, coat the exposed portion of the screen with Scotch tape.
Step 5: Finally, Print It
Place your cloth on a flat surface and stuff a square-sized cardboard on the inner side of the t-shirt where you want to print. Lay the screen on the t-shirt with the image where it will be printed.
Slightly spill a small amount of ink horizontally over the top of the screen. Move your squeegee smoothly down the screen. Exert pressure gradually. It is good to run a test print on scrap paper instead of using your target garments. Move your squeegee up and down, and left and right, a couple of times. It pushes the inks through onto the clothes.
You are almost finished. Pull your screen up and cardboard out. It is a good idea to send your t-shirt into the oven and keep it at 400 degrees for 30 minutes. It will ensure that the design sticks to the shirt for a long time.
Step 6: Wash and Clean-up
As the screen printing inks dry quickly, you can wash the inks just after printing is done. Clean your screen as thoroughly as possible so you can use it further. If you intend to print a completely different design, clean the screen with an emulsion remover.
Manual screen printing is time-consuming and complicated, with many automatic digital screen printing machines available on the Market. As it is an entirely manual process, it creates risk and difficulty at every step. After all, it will be easier once you get used to this method. Despite this, digital screen printing machines, which range from lower to higher prices, would be a better option for your business size. Today, we investigate some t-shirt printing machines at a reasonable price for your business.
Related Articles About Silk Screen Printing Machine:
-
- Ridgeyard 4 Color 1 Station Silk Screen Printing Machine, Screen Printing Press T-Shirt Printing Machine
- What is a Silk Screen Printing Machine?
- Superland Screen Printing Machine 4 Color Silk Screen Printing Machine 1 Station DIY Shirt Equipment
- Superland Screen Printing Machine 4 Color Silk Screen Printing Machine 4 Station Adjustable Devices Press Printer DIY Shirt Equipment (4 colors 4 station)
- Happybuy Silk Screen Printing Machine Adjustable Double Spring Device(4 Color 1 Station)
- Silk Screen Printing Machine 4 Color 4 Station Screen Printing Presses DIY T-Shirt
- Happybuy Screen Printing Machine Press 4 Color 1 Station Silk Screen Printing Machine Adjustable Double Spring Devices
- Simple Single 1 Color 1 Station T-shirt Silk Screen Printing Machine NS101
- DeEtt Silk Screen Printing Machine Adjustable Devices DIY T-Shirt Printing Machine (4 Color 1 Station)
- Superland Silk Screen Printing Machine 4 Color Screen Press Printer DIY T-Shirt Printing Equipment
- Maxwolf Silk Screen Printing Machine 4 Color 2 Station Double Spring T-shirt Press DIY
- BestEquip Screen Printing Machine for T-shirt DIY Silk Screen Removable Pallet (1 Station 4 Color)
Read More Guidelines:

Leave a Reply
You must be logged in to post a comment.